Here is the procedure to set up and use Google Analytics 
SETTING UP GOOGLE ANALYTICS ON YOUR BLOG
Go to www.google.com/analytics . Click 'Sign In'.

Click Sign Up

Enter the following details :
Website Name : Any name
Web Site URL : The URL of your blog
Reporting Time Zone : India
Account Name : Any Name
Click 'Get Tracking ID button'
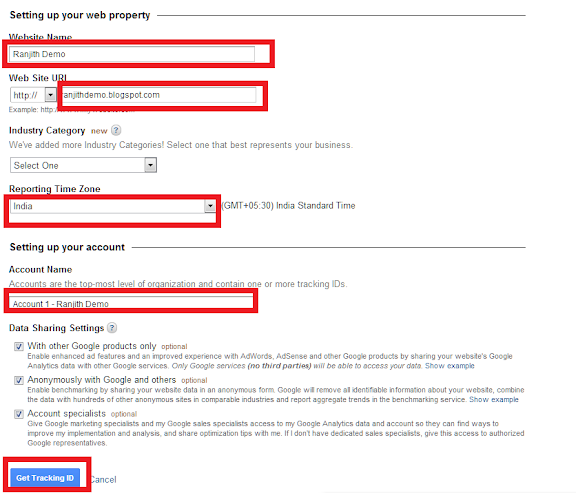
Click 'I Accept'

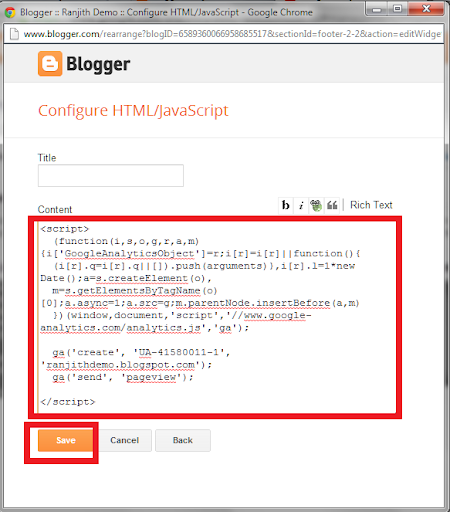
Copy the code

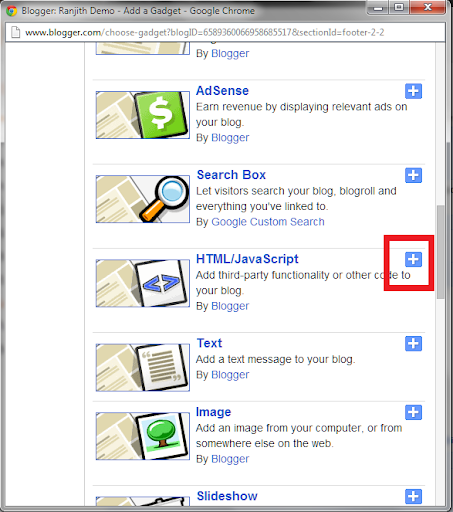
Go to blogger.com -> Layout

Click 'Add Gadget' ( anywhere )

Choose 'HTML/ Javascript'
Paste the code you have copied and click 'Save'
BLOCKING YOUR OWN VISITS
Install this chrome extension : https://chrome.google.com/webstore/detail/block-yourself-from-analy/fadgflmigmogfionelcpalhohefbnehm
Go to your blog. If you see the icon shown in the figure below, the GA code was inserted correctly.

Click on that button and click 'Block Yourself from Analytics'
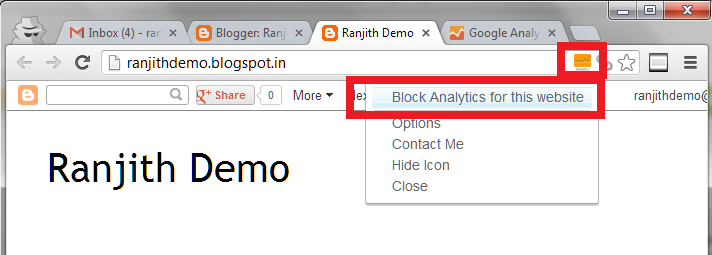
Refresh the page. You will see the icon with a red mark.

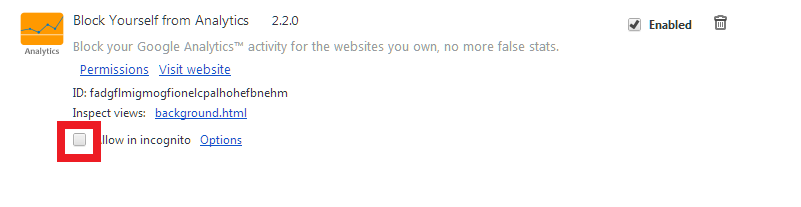
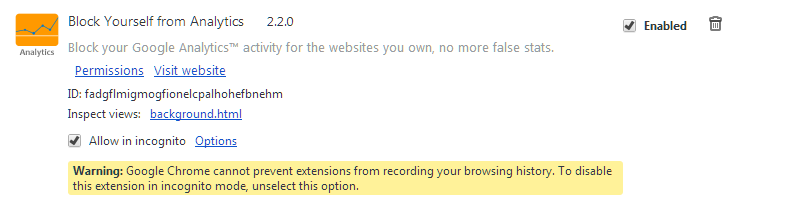
Allow the extension in Incognito window ( if you want ) :
Click the Option icon

Click Settings

Click Settings on the left

Click 'Allow in incognito'
CREATING A CUSTOM REPORT SO THAT YOU CAN VIEW THE FULL REFERRAL PATH
[ Forgot the original article which I referred for this part ]
Ex : In GA, the source will be shown as indiblogger.in. With this filter, you can view the full source such as indiblogger.in/forum/
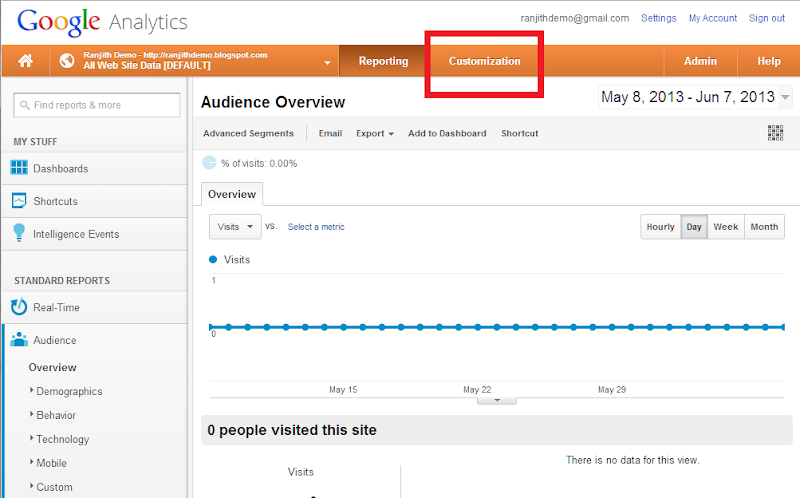
Go to google.com/analytics Click 'All Web Site Data'

Click Customisation
Click 'New Custom Filter'

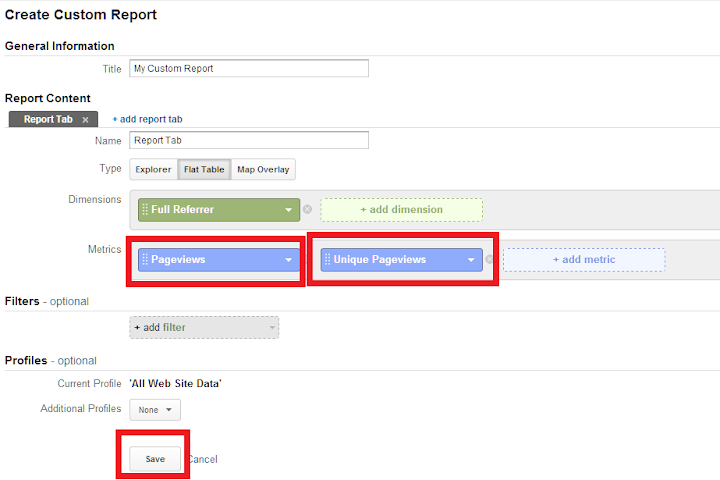
The following screen appears
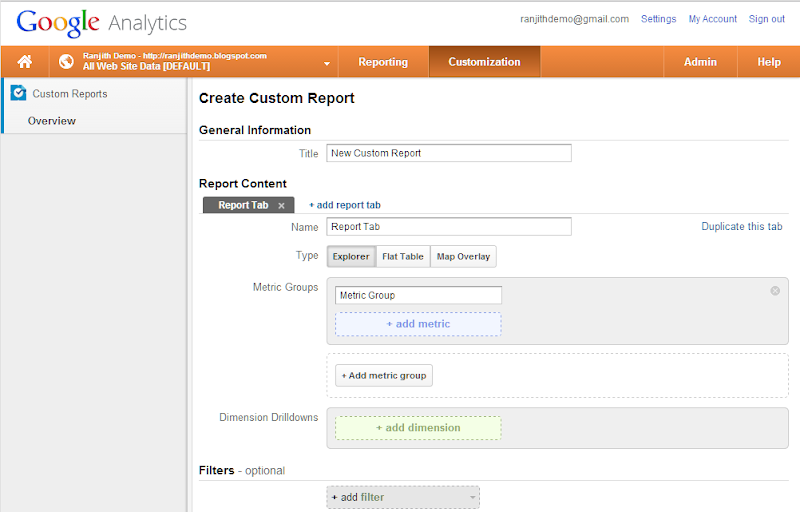
Choose Flat Table for type.
Click '+ add dimension'. Search for 'Full Referrer' and select it.

For Metrics, choose 'Page Views' and 'Unique Pageviews'. You can select whatever metrics you want. Click Save.
SETTING GA SO THAT QUERY STRING WILL ALSO BE TRACKED ( Not sure if this works ) ( You may skip this )
[ This part was taken from here ]
Query String is the part after the question part. Ex: In http://www.indiblogger.in/indipost.php?post=243017 post=243017 is the query string.
Go to google.com/analytics and click 'All Web Site Data'

Click Admin

Click 'All Web Site Data'
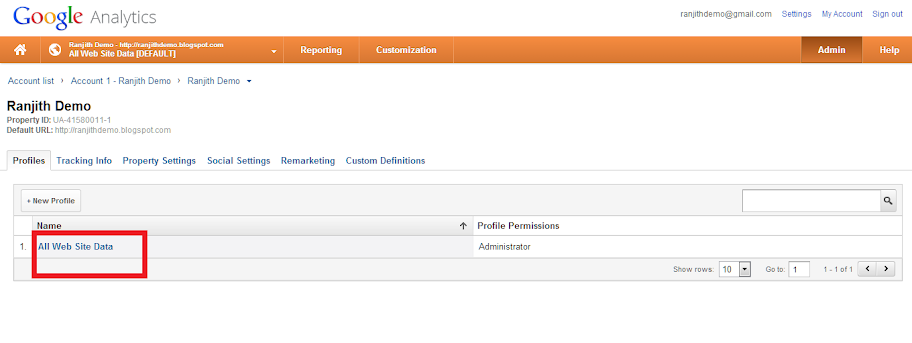
Click Filters

Click New Filter

Give a Filter Name ( for example : Full Referral Path ) and select 'Custom Filter' as the filter type.

Choose the option Advanced and enter the following details :
Field A -> Extract A [ Referral ] (.*)
Output to -> Constructor [ User Defined] $A1
Click Save

You will see the following page

SETTING UP ANALYTICS IS COMPLETED.
USING ANALYTICS
Go to google.com/analytics and click 'All Web Site Data'
On the left, you can see standard reports": Audience, Traffic Sources and Content
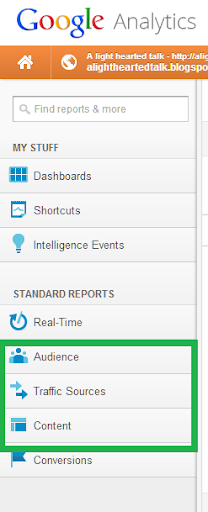
Click Traffic Sources -> Sources -> All Traffic

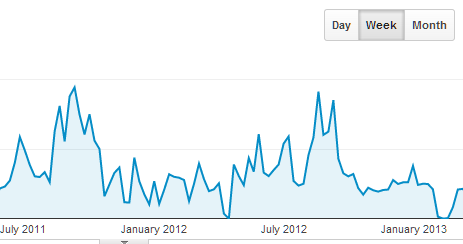
You can choose a data range.


You can also choose how you want the graph to be displayed : day, week or month


The table below shows different information - Average Visit Duration ( how long the visitor stayed on your blog ), Bounce Rate ( If your visitor viewed only the page he entered and left your blog, it adds to bounce rate - so, lower bounce rate is better ), pages/ visit and so on.
You can display more than ten rows at a time. Move through the table using the arrow buttons.
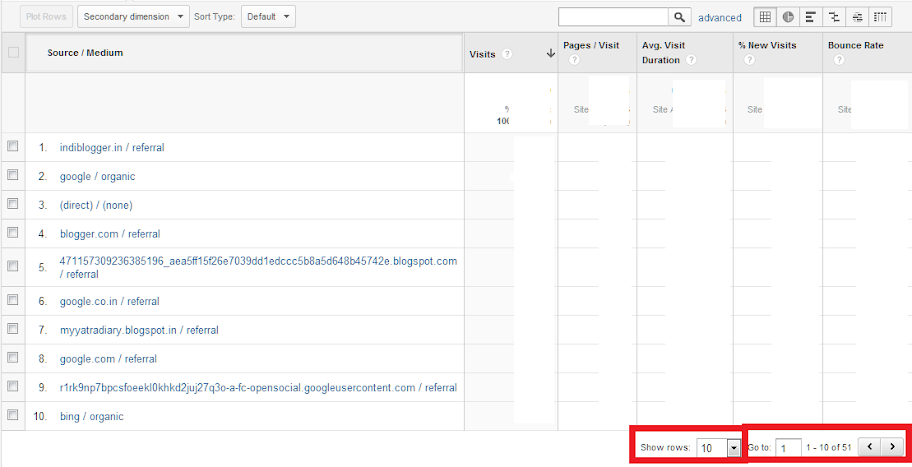
You can sort a column in ascending / descending order by clicking on it.

Also, explore the contents and audience reports. The Contents report shows which pages were viewed. Audience report gives information about your audience - location, OS, browser etc.
USING THE CUSTOM REPORT WE CREATED TO VIEW FULL REFERRAL SOURCE
In these standard reports, you can't see the full referral URL - you are shown only the domain name. For example, if someone visited your blog from indiblogger.in/forum/ you see indiblogger.in as the source. That was the reason, we created a custom report. To use, it:
Click Customisation -> New Custom Report 1
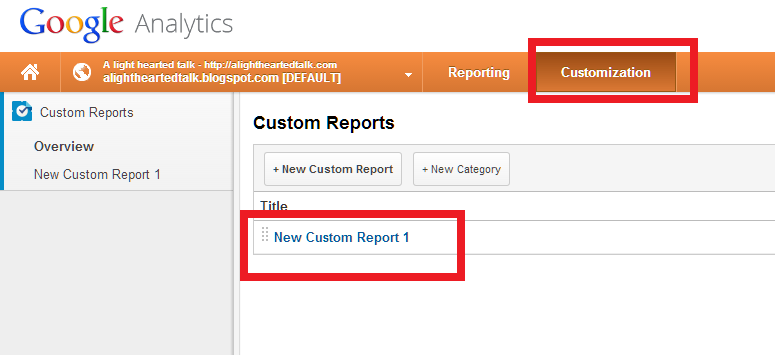
Here is a screenshot showing full referral URL.




 ..
 I think we both are equally new